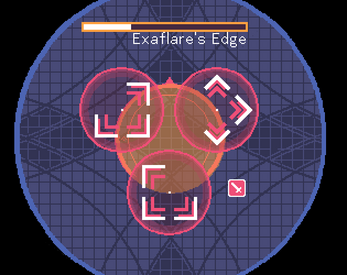
FFXIV Dragonsong's Reprise: Exaflare Helper
Movement: WASD or Arrow keys
Dummy rotation: E
Spacebar: toggles display of "safe" flare
v2.1
helper tool for people progging the new FFXIV Ultimate.
I am but a simple stream viewer/savage player but let me know if this helps.
Feedback is welcome - I'm still updating with new patterns and bug fixes when I can.
Braindead strategy is to move into the south flare marker after its initial hit, then south again after the second blasts. Just be wary of potential lost uptime using this strat.
Otherwise: the game designates at least one flare as "safe" by ensuring the other flares don't point to it. Look for this flare and move into it after the first blast. You can practice identifying this flare by pressing spacebar to highlight it in green.
history:
v2.1 updated flare patterns. including dynamo/chariot, there's over 100 more variants now.
v2.0: new arena and hitboxes modelled to scale with the game. Flares slowed to match in-game timings. Visual updates (floor patterns + effects). Minor bug fixes.
v1.6: new patterns, minor graphical updates
v1.5: added new patterns from streamed clears, minor hitbox updates
v1.3 added GCD functionality
v1.0 initial release

Comments
Log in with itch.io to leave a comment.
nice work on this!
i've played it a lot and haven't seen any patterns that match the first 2 sets in this video: https://youtu.be/budIh9i27VA?t=919
it is possible for all 3 exaflares to move 'intercardinally' so to speak but I haven't come across it in this sim, just commenting in case you hadn't seen this pattern before
hey thanks!
The patterns I added here were just based on the first couple of clear parties. The game probably has a proper formula for creating them while ensuring a safe zone, I was just too lazy to check over them while working on everything else. But I can definitely include more patterns in an update soon.
Good for visualization but it really needs the floor pattern; part of the "braindead strat" is that you move to the center of the rear exaflare, then to the intersecting lines on the floor (of the two south diamonds). This would make practicing much more 1:1 with the in-game movement.
The pattern can be found at https://github.com/kotarou3/ffxiv-arena-images/tree/master/dsu as "dsu-p5" if you wanted to potentially implement them.
Ah thanks for the link – was searching for something like that when I first made this actually.
tbh I originally made this before the braindead strat was published – I wasn’t sure if it would be useful afterwards. I’m aware it has some other inaccuracies that prevent it from being 1:1 already, I’ll try fixing them along with the floor patterns as soon as I can
No worries, it can definitely be rough trying to translate every little nuance into a format like this. Thanks for your work!